Claim History Checker
Can’t remember all those sweet and juicy rewards that you already claimed? Fear not, I’ve got your back!
- Address
Documentation
I’ve tried to put enough info into the tool above, but as I write this from my perspective and I already know what to do 🤣 here’s some more info that will make using the Claim History Checker a breeze!
Step 1: Your Sandbox user ID
Start by hitting the Open User Info button above. Please make sure you’re logged into the Sandbox website with your current browser, because it won’t work otherwise. Once you click the button, a new tab will open with some scary content. It’ll look something like this:
{"id":"987feea4-a658-41ed-b080-10c10e786423","name":"FunnyUsername","title":null, ... }We are only interested in the part right at the beginning, that long string of random letters and numbers, here 987feea4-a658-41ed-b080-10c10e786423, yours will obviously be different. Copy that string, without the quotes, and paste it in the next textfield that says Paste your user ID here!. Or if you’re really unsure, just copy everything and paste it. 😅 Bam! Step 1 done. Or wait
Saving your Sandbox user ID for your next visit
If you want, you can save your Sandbox user ID. It will be saved locally on your computer.
To do that, simply hit the disk button after you’ve pasted your user ID. The disk button will turn green to show that your user ID is saved. On your next visit, the user ID field will be prefilled with your user ID and the button wil still be green.
If you want to remove the saved data, simply hit the trash button, your user ID will be removed from your local store, and the disk will go back to gray again.
Step 2: Claim History Data
After you’ve completed Step 1, hit the Open Data button. A new tab will open with even scarier content. But this time you don’t have to look for something special, just select all and copy everything. Then paste it in the text field that says Paste copied data here!. Repeat for the second data set. Hit Analyze and you’re good for Step 3.
Step 3: Inspect your Claim History
Well, there’s not much to say about this. If you’ve followed the steps above, you should be already checking your claim history. What are you waiting for?!
Other tools
Vodact has basically the same tool on his website, so you can use his version as well! (THB, I’ve copied some workflows from his checker because it was so much easier to use than my first version 👼)
How to check your claim history manually
If you’re still reading, you obviously don’t want to use my tool and do it full manual. That’s okay.
For the manual way, you have to use the DevTools of your browser. I’ve done it in Chrome, haven’t testes any other browser and won’t test in other browsers. But it should work there too. Let’s get started.
-
On the Sandbox website, click on your profile pic and navicate to Claims. This link will also take you to the Claims section.
-
Press F12 to open Chrome DevTools and go to the Network tab.
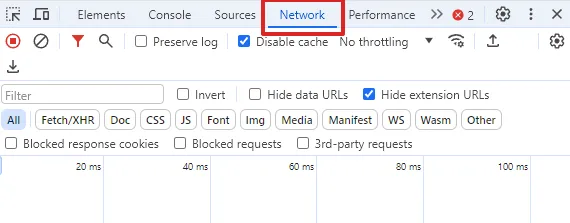
The Network tab sometimes hides behind the double arrow . Just click on it and you’ll find the tab.
-
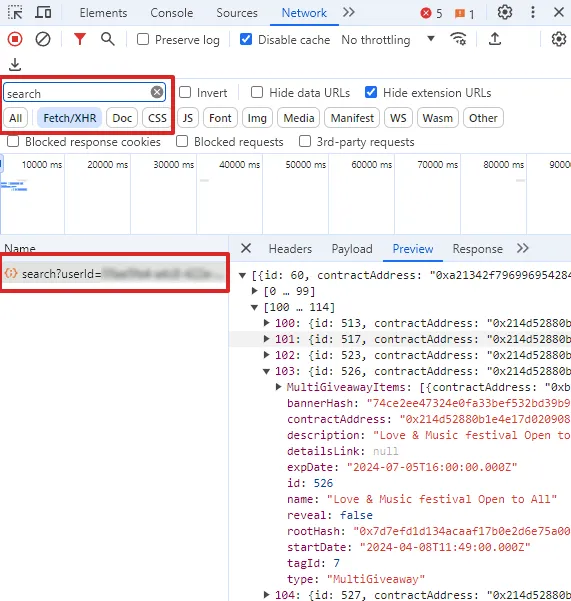
Type search in the Filter text box and select Fetch/XHR, then reload the page.
-
Next, click the entry named search?userId=…. You can now explore all your rewards in the preview area on the right. The rewards are hidden behind the MultiGiveawayItems key.
-
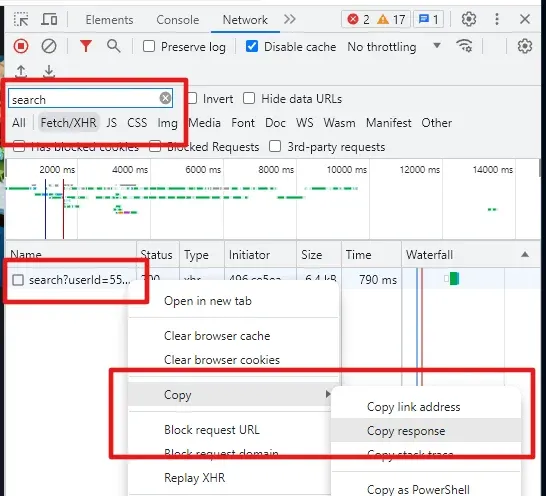
(Optional) If you have problems reading the data in Step 4, you can also copy the response as shown in the following image and paste that into the textfield from step 2 and hit Analyze.